Dựng API import CSV bằng Nodejs và Express
Tản mạn
Nodejs luôn luôn là một lựa chọn tốt cho startup.
Lý do ư?
- Nhanh (có hàng tá bài viết nói tại sao Nodejs lại nhanh rồi)
- Dễ code, dễ học, dễ tiếp cận, và dễ maintain: Nhân sĩ trên giang hồ chỉ cần biết một môn công pháp Javascript thôi là đã đủ để luyện cả 2 phần backend và frontend.
- Thư viện hỗ trợ nhiều, cộng đồng đông đảo.
Tình cờ hôm bữa mình lướt thấy 1 bài viết nói về tối ưu hiệu suất cho Nodejs, mình nghĩ bụng hay là làm một cái thử xem nhỉ. Ơ thế là làm thật, và ra bài viết này.
⚠️ Cảnh báo: Bài viết rất dài và chi tiết.
Giới thiệu về project
Mình đã quyết định thử nghiệm một chút với Nodejs, và sẽ làm 2 phần, phần đầu tiên sẽ là dựng một service để phục vụ mục đích chính là import CSV.
Phần tiếp theo sẽ là tối ưu performance. Đợi bài sau sẽ rõ.
Tại sao lại là import CSV?
Thực ra các project CRUD đã quá nhiều rồi, mà mình muốn test thử hiệu năng, cho nên CSV là một lựa chọn không tồi để thử sức với các dataset lớn hàng trăm nghìn dòng, hoặc hàng triệu dòng, mà cũng là do một phần mình đọc được bài viết này 1.
Mà thực tế các hệ thống hiện nay vẫn còn dùng CSV Importer đấy thôi, trong đó có công ty mình.
Ưu điểm của CSV
- Thân thiện hơn với user non-tech
- Dễ dàng quản lý relationship
- Có thể dùng để migrate data từ hệ thống cũ qua hệ thống với với sự khác biệt về cấu trúc data.
- … bạn tự điền nếu bạn có dùng rồi 😂.
First things first
Again, nếu bạn không biết thì mình là Kiên bê đê (lúc đi cùng bạn gái), một anh chàng developer thích viết. Mình đang cố gắng nâng cao kiến thức về máy tính và lập trình bằng nhiều cách như đọc sách, học các khóa học, đọc, và cả viết blog cho mấy cái experiment của mình nữa.
Hi vọng những bài viết của mình sẽ giúp được bạn, mình rất vui ❤️.
Bắt tay vào code
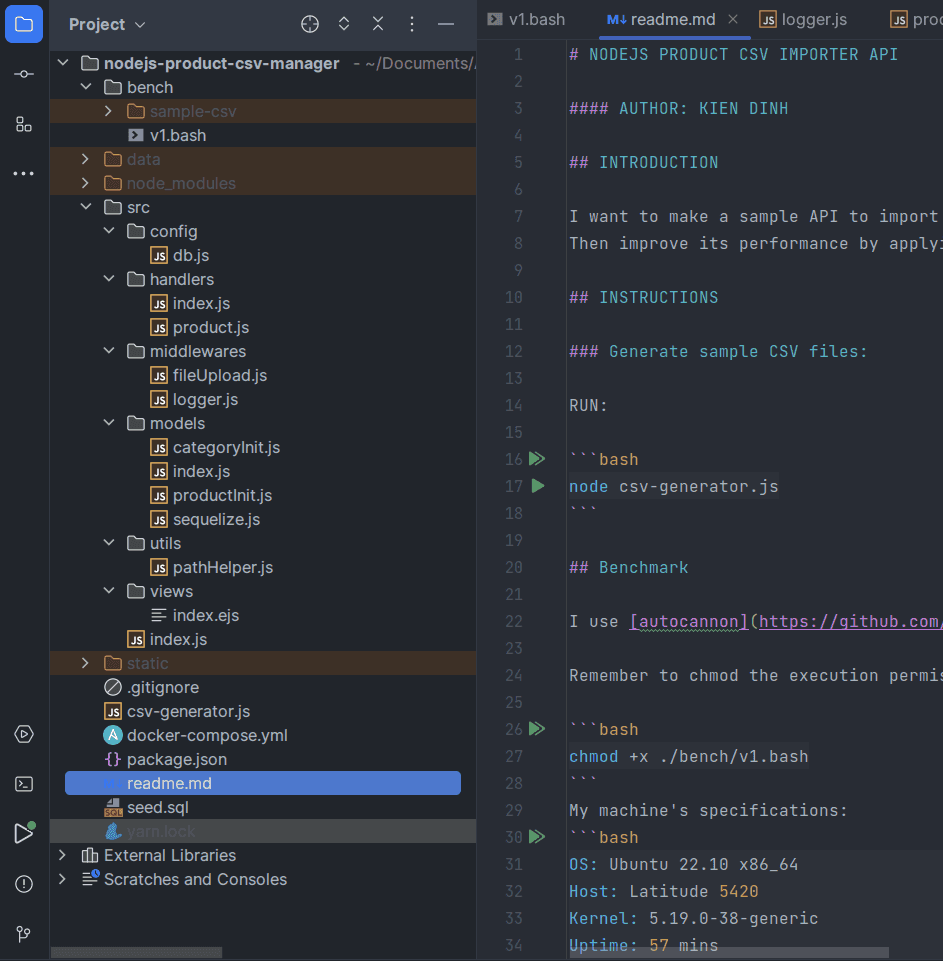
Và đây là cấu trúc dự án mình đã code xong version 1:
Code hiện có ở trên github repo2, các bạn tham khảo nhé.
Khởi tạo Nodejs Project
Mình thích typescript hơn javascript nhiều, tuy nhiên sau khi dùng Goland/IntelliJ để code thì intellisense hoạt động rất tốt, mình cảm giác không cần typescript cũng không sao 😄. Vậy nên để tập trung vào vấn đề chính, mình code Javascript cho lẹ.
Mình giả định các bạn cũng dùng Linux/Mac, nên mình dùng command trên linux luôn.
Tạo folder và init:
mkdir nodejs-product-csv && cd nodejs-product-csvyarn initĐiền vài thông tin cơ bản xong thì đến với bước thêm thư viện:
yarn add express ejs multer fast-csv csv-writer pg sequelize colorsyarn add -D nodemon autocannon @faker-js/fakerĐến đây thì để tại hạ phải ra mặt giới thiệu những thư viện trên cho các đạo hữu rồi:
- express: Web framework của nodejs, nổi tiếng nhỏ mà có võ.
- ejs: Javascript template engine, dùng như Razor trong .NET vậy, giúp chúng ta render các file template HTML.
- multer: Middleware hỗ trợ cache file upload.
- fast-csv, csv-writer: Hai thư viện này phục vụ cho việc đọc và xuất CSV từ dữ liệu của chúng ta.
- pg: Driver cho postgresql.
- sequelize: ORM này hỗ trợ tốt việc define schema và khá tối ưu query. Mình chọn sequelize vì nó khá đơn giản, còn nếu làm typeorm hay prisma thì hiệu năng cao hơn, nhưng tốn thời gian setup hơn nên mình lười. Thêm vào đó, với kinh nghiệm của mình thi sequelize cũng hỗ trợ query tốt hơn trong trường hợp không sử dụng raw-query, đặc biệt là các field JSON.
Tương tự mình cũng cài thêm vài package hỗ trợ cho việc dev mượt mà hơn:
- nodemon: Hỗ trợ reload app khi chúng ta thay đổi code (watch mode).
- autocannon: HTTP benchmark tool, giúp mình đo hiệu năng của app.
- @faker-js/faker: Thư viện hỗ trợ fake data, rất hữu ích trong việc generate cả triệu dòng CSV để test.
Cấu trúc thư mục
Trước khi code mình show cho các bạn xem cấu trúc thư mục, để cho các phần tiếp theo được dễ hình dung:
.
├── bench
│   ├── sample-csv
│   └── v1.bash
├── csv-generator.js
├── data
│   └── postgres //readonly
├── docker-compose.yml
├── package.json
├── src
│   ├── config
│   │   └── db.js
│   ├── handlers
│   │   ├── index.js
│   │   └── product.js
│   ├── index.js
│   ├── middlewares
│   │   ├── fileUpload.js
│   │   └── logger.js
│   ├── models
│   │   ├── categoryInit.js
│   │   ├── index.js
│   │   ├── productInit.js
│   │   └── sequelize.js
│   ├── utils
│   │   └── pathHelper.js
│   └── views
└── static
    ├── exports
    └── uploads
Dựng database postgresql
Như trong bài trước về connection pooling, mình đã tạo 1 DB postgres cho bảng Product rất đơn giản. Bài này mình dùng lại cái schema đó và có vài thay đổi.
Lần này mình có 1 bảng Product, liên kết khóa ngoại tới bảng Category.
File seed.sql để khởi tạo database và chèn sẵn 10 danh mục (category):
-- We need double quoted the column names to preserve the case.
CREATE TABLE IF NOT EXISTS categories
(
    id          VARCHAR(36) PRIMARY KEY,
    name        VARCHAR(255) NOT NULL,
    description TEXT,
    code        VARCHAR(12)  NOT NULL,
    "createdAt" TIMESTAMP    NOT NULL DEFAULT NOW(),
    "updatedAt" TIMESTAMP    NOT NULL DEFAULT NOW()
);

CREATE TABLE IF NOT EXISTS products
(
    id           VARCHAR(36) PRIMARY KEY,
    name         VARCHAR(255)   NOT NULL,
    price        NUMERIC(10, 2) NOT NULL,
    description  TEXT,
    "categoryId" VARCHAR(36)    NOT NULL,
    "createdAt"  TIMESTAMP      NOT NULL DEFAULT NOW(),
    "updatedAt"  TIMESTAMP      NOT NULL DEFAULT NOW(),
    CONSTRAINT products_categoryId_fk FOREIGN KEY ("categoryId") REFERENCES categories (id) ON DELETE CASCADE
);
INSERT INTO categories (id, name, description, code)
VALUES ('b2ff1377-c40c-4c10-b3a4-4d12c2f90bca', 'Electronics', 'Category for electronic devices', 'ELC'),
       ('8c054e34-e65d-4b6e-b7f1-9d9b556e10d1', 'Clothing', 'Category for clothing items', 'CLT'),
       ('a18b11cc-9a2e-4a04-b831-dde4667e8e0a', 'Books', 'Category for books and literature', 'BKS'),
       ('773e7aa3-f06d-42af-a8c3-3cb50d966f26', 'Home & Kitchen', 'Category for home and kitchen products', 'HKP'),
       ('b8f3c3eb-30f6-41dd-a7b8-518ff2db616f', 'Health & Beauty', 'Category for health and beauty products', 'HBP'),
       ('5c6f5df6-5c5f-4a69-a38c-95d330c156e2', 'Toys & Games', 'Category for toys and games', 'TNG'),
       ('54b31c80-38f6-4e6a-9f70-049a8e0905c9', 'Sports & Outdoors', 'Category for sports and outdoor products', 'SPO'),
       ('66d74c4b-4b4d-4a54-935d-6b0b6faa07f4', 'Automotive', 'Category for automotive products', 'AUT'),
       ('23212a97-74af-460e-bd3d-7b1320dd1c25', 'Office Products', 'Category for office supplies and stationery',
        'OFS'),
       ('141d2f17-91d8-4f9d-9143-3b8213c6f5a5', 'Pet Supplies', 'Category for pet supplies and accessories', 'PET');
Có một lưu ý nhỏ, postgresql không giống với SQLServer, khi chúng ta tạo table thì nó sẽ tự động lowercase hết column name như createdAt → createdat và làm cho Sequelize query bị lỗi.
Để né việc đó, chúng ta cần thêm nháy kép ("createdAt") trong DDL.
Tiếp tục tạo file docker-compose.yml để seed data:
version: "3.9"

services:
  postgres:
    image: postgres:13.1-alpine
    container_name: product_postgres_container
    volumes:
      - ./seed.sql:/docker-entrypoint-initdb.d/seed.sql
      - ./data/postgres:/var/lib/postgresql/data
    environment:
      - POSTGRES_DB=${POSTGRES_DB:-postgres}
      - POSTGRES_USER=${POSTGRES_USER:-postgres}
      - POSTGRES_PASSWORD=${POSTGRES_PASSWORD:-password1}
    ports:
      - "5433:5432"
    restart: unless-stopped
Giờ ta chỉ cần chạy docker compose up -d là đã có 1 instance postgres ở cổng 5433.
Dựng model và kết nối database
Mình trước hết cần một file config để lưu thiết lập, connection string của database, đó là file /src/config/db.js :
const dbConfig = {
  HOST: "localhost",
  USER: "postgres",
  PASSWORD: "password1",
  PORT: "5433",
  DB: "postgres",
  dialect: "postgres",
  pool: {
    max: 4, // max pool size
    min: 1, // min pool size
    acquire: 3000, // timeout to wait connection in  milliseconds
    idle: 10000, // idle time in milliseconds
  },
};

export default dbConfig;
Ở đây mình hardcode luôn các biến môi trường, thực tế có thể thêm vài dòng để đọc ra từ file .env .
Sequelize có hỗ trợ connection pooling mặc định luôn trong các thiết đặt, nếu bạn chưa biết thì đọc bài viết trước3 của mình nhé.
Vào folder src/models để chúng ta làm việc tiếp, đầu tiên chúng ta cần 1 instance của Sequelize, lấy config từ file config hồi nãy:
import dbConfig from "../config/db.js";
import { Sequelize } from "sequelize";
import colors from "colors";

export const sequelize = new Sequelize(
  dbConfig.DB,
  dbConfig.USER,
  dbConfig.PASSWORD,
  {
    host: dbConfig.HOST,
    dialect: dbConfig.dialect,
    operatorsAliases: 0,
    port: dbConfig.PORT,
    pool: {
      max: dbConfig.pool.max,
      min: dbConfig.pool.min,
      acquire: dbConfig.pool.acquire,
      idle: dbConfig.pool.idle,
    },
    define: {
      timestamps: true,
      underscored: false,
    },
    benchmark: true,
    logging: (message, execTime) => {
      if (message.length > 500) {
        message = message.slice(0, 500) + "... (truncated)";
        // You can use something like cloud logging...
      }
      let color = colors.blue.bold;
      if (execTime && execTime >= 30) {
        color = colors.red.bold;
      }
      console.log(colors.magenta.bold(`[${execTime} ms]`), color(message));
    },
  }
);

sequelize
  .authenticate()
  .then(() => {
    console.log("Connection has been established successfully.");
  })
  .catch((err) => {
    console.error("Unable to connect to the database:", err);
  });

export default sequelize;
Ở đây mình cũng làm luôn 1 cái logger đơn giản cho sequelize, để in ra những query nào tốn thời gian để thực thi thì bôi nó thành màu đỏ, khỏi cần dùng ASCII code vì có thư viện colors lo.
Tiếp tục define model schema cho bảng Product và Category tương tứng 2 file ProductInit.js và CategoryInit.js:
import Sequelize from "sequelize";
import sequelize from "./sequelize.js";

const ProductInit = sequelize.define("products", {
  id: {
    type: Sequelize.UUID,
    defaultValue: Sequelize.UUIDV4,
    primaryKey: true,
  },
  name: {
    type: Sequelize.STRING,
  },
  price: {
    type: Sequelize.FLOAT,
  },
  description: {
    type: Sequelize.STRING,
  },
  categoryId: {
    type: Sequelize.UUID,
  },
  createdAt: {
    type: Sequelize.DATE,
  },
  updatedAt: {
    type: Sequelize.DATE,
  },
});

export default ProductInit;
import Sequelize from "sequelize";
import sequelize from "./sequelize.js";
const CategoryInit = sequelize.define("categories", {
id: {
type: Sequelize.UUID,
defaultValue: Sequelize.UUIDV4,
primaryKey: true,
},
name: {
type: Sequelize.STRING,
},
code: {
type: Sequelize.STRING,
},
description: {
type: Sequelize.STRING,
},
createdAt: {
type: Sequelize.DATE,
},
updatedAt: {
type: Sequelize.DATE,
},
});
export default CategoryInit;Tạo 1 file index.js để khai báo thêm ràng buộc khóa ngoại cho 2 table trên.
Ở đây Product và Category có quan hệ Many-To-One, cho nên mình sử dụng 2 phương thức của Sequelize là hasMany và belongsTo .
import ProductInit from "./productInit.js";
import CategoryInit from "./categoryInit.js";
import Sequelize from "sequelize";

CategoryInit.Products = CategoryInit.hasMany(ProductInit, {
  foreignKey: {
    name: "categoryId",
    type: Sequelize.UUID,
  },
});

ProductInit.belongsTo(CategoryInit, {
  foreignKey: {
    name: "categoryId",
    type: Sequelize.UUID,
  },
});

export { ProductInit as Product, CategoryInit as Category };
Có thể bạn sẽ hỏi tại sao mình không khai báo luôn relationship ở trong ProductInit và CategoryInit . Đáp án là bởi vì nếu làm vậy sẽ xảy ra lỗi circular import.
Mình cũng muốn export chỉ mỗi model để thao tác query, nên cũng không gán 2 model này vào instance của Sequelize. Coi tiếp phần dưới thì bạn sẽ thấy mình chỉ import model từ models/index.js mà thôi.
Cache lại file đã upload
Như bạn đã biết, lúc import thì file CSV có thể lên tới hàng triệu dòng, do vậy nên kích thước file khá là lớn (tầm 150mb cho 1 triệu dòng), thế nên việc cache lại file vào ổ cứng là điều bắt buộc phải làm.
Tạo 1 middleware middlewares/fileUpload.js :
import fs from "fs";
import multer from "multer";
import appDir from "../utils/pathHelper.js";

const storage = multer.diskStorage({
  destination: (_req, file, callback) => {
    const dir = appDir + "static/uploads";

    if (!fs.existsSync(dir)) {
      fs.mkdirSync(dir, { recursive: true });
    }
    callback(null, dir);
  },
  filename: (_req, file, callback) => {
    callback(null, `${process.hrtime.bigint()}-${file.originalname}`);
  },
});

const csvFilter = (_req, file, callback) => {
  console.log("Reading file in middleware", file.originalname);
  if (!file) {
    callback("Please upload a file to proceed.", false);
  } else if (file.mimetype.includes("csv")) {
    callback(null, true);
  } else {
    callback(
      "Please upload only csv file as only CSV is supported for now.",
      false
    );
  }
};

export default multer({
  storage: storage,
  fileFilter: csvFilter,
});
Đặc thù hệ thống là import CSV, do vậy nên middleware này chỉ cho phép upload file có đuôi csv mà thôi, sau đó cache lại trong ổ đĩa.
Ở đây mình cache lại file name theo dạng ${process.hrtime.bigint()}-${file.originalname}.
Lý do mình dùng process.hrtime.bigint() thay vì Date.now() chính là khi mình thực hiện stress test (ở bước tiếp theo) thì lượng request đồng thời rất lớn, khiến cho hàm Date.now() trả về giá trị đôi lúc giống nhau, cho nên file bị conflict.
process.hrtime.bigint() sẽ có resolution cao hơn, trả về nanoseconds, còn Date.now() trả về milliseconds4.
Ở đây do với chế độ module thì thằng quỷ Nodejs không cho phép gọi __dirname. Nên mình làm 1 cái file helper để lấy folder root của project nằm ở utils/pathHelper.js:
import path from "path";
import { fileURLToPath } from "url";

const __dirname = path.dirname(fileURLToPath(import.meta.url));
const appDir = path.join(__dirname, "../../");

export default appDir;
Các endpoint REST API
Như đã nói ở đầu bài viết, mục đích chính của service này là để import CSV. Do đó mình chỉ có vài endpoint sau:
/- GET: Index, dùng để làm giao diện cho form upload CSV./api/products- GET: Lấy 200 product mới nhất để hiển thị./api/products/:id- GET: Lấy product theo ID./api/products/export- GET: Export products ra file CSV và download./api/products/import- POST: Import CSV file.
Handler của những endpoint này sẽ nằm trong folder handlers.
Bắt đầu với file product.js cho những handler liên quan em này:
Get many products
Mình query lấy ra 200 product mới nhất:
export const findManyProducts = async (req, res) => {
  try {
    // should add pagination.
    const products = await Product.findAll({
      limit: 200,
      include: [
        {
          model: Category,
        },
      ],
      order: [
        ["updatedAt", "DESC"],
        ["createdAt", "DESC"],
      ],
    });
    res.send({
      message: "OK",
      data: products,
    });
  } catch (err) {
    console.error(err);
    res.status(500).send({
      message: "internal error",
      err: err,
    });
  }
};
Thực tế cần phải làm thêm phần pagination, nhưng mục tiêu chính mình làm không phải ở đó nên đã bỏ qua.
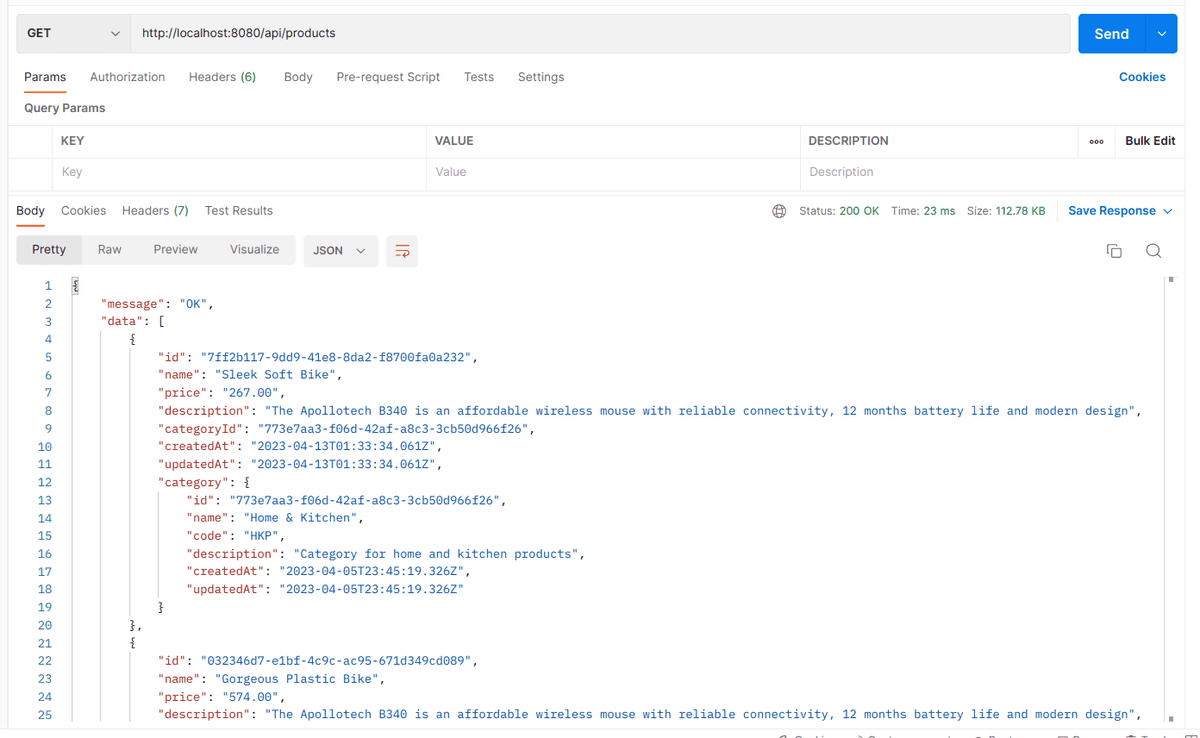
Mình có dùng option include, tức là sẽ join và lấy luôn Category về, kết quả sẽ hiển thị ở postman như sau:
Get product by ID
Cũng giống với findMany, khi lấy chỉ 1 product theo ID thì chúng ta chỉ cần lấy id từ path params vào thôi:
export const findOneProduct = async (req, res) => {
  const id = req.params.id;
  try {
    const product = await Product.findByPk(id, {
      include: [
        {
          model: Category,
        },
      ],
    });
    if (product) {
      res.send({
        message: "OK",
        data: product,
      });
    } else {
      res.status(404).send({
        message: `Cannot find Product with id=${id}.`,
      });
    }
  } catch (err) {
    res.status(500).send({
      message: `Error retrieving Product with id=${id}`,
      error: err,
    });
  }
};
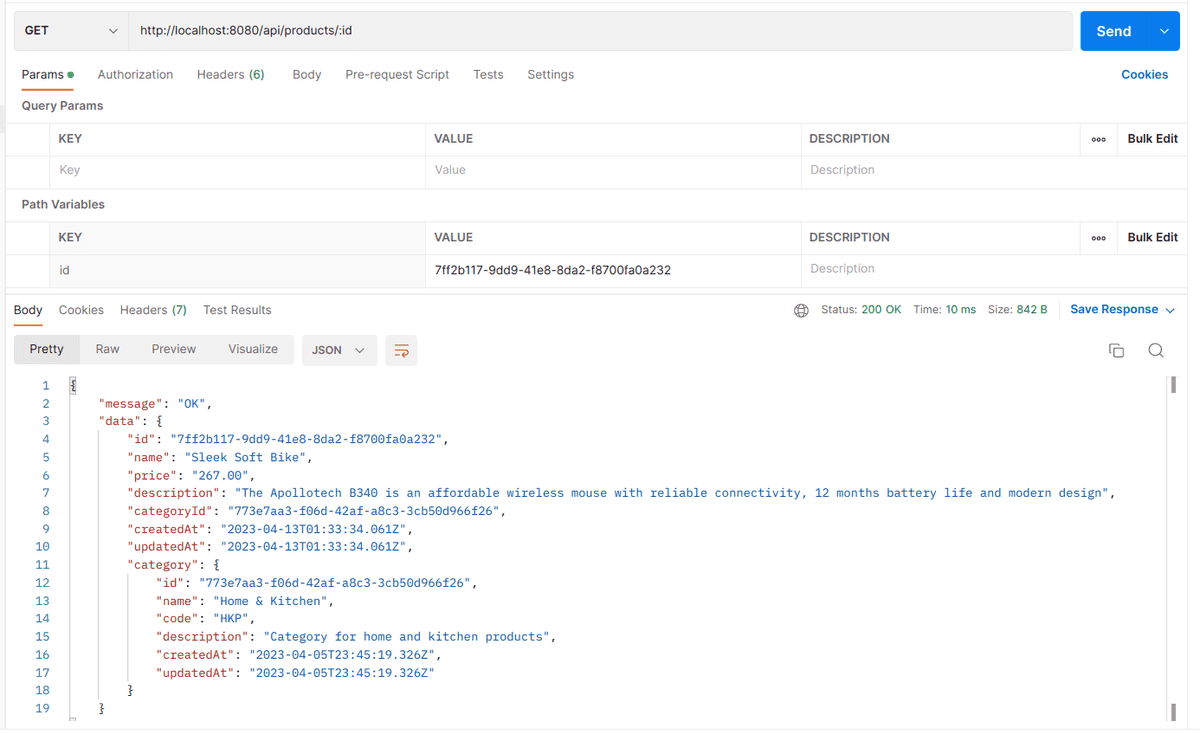
Kết quả khi gọi postman:
Import products
Đây là nhân vật chính của ngày hôm nay, endpoint dùng để xử lý file CSV và thêm vào database.
export const importProducts = async (req, res) => {
  if (!req.file) {
    console.log(req.file);
    res.status(400).send({
      message: "No file is uploaded",
    });
    return;
  }
  const rows = [];
  let path = appDir + "static/uploads/" + req.file.filename;
  const categories = await Category.findAll({
    attributes: ["id", "name", "code"],
  });
  const categoryMap = new Map(
    categories.map((c) => {
      return [c.dataValues.code, c.dataValues];
    })
  );
  try {
    let rowNumber = 1;
    const parser = csv
      .parse({ headers: true })
      .on("error", async (err) => {
        console.error(err.message);
        await fs.promises.unlink(path);
        res.status(400).send({ message: err.message });
      })
      .on("data", (data) => {
        const category = categoryMap.get(data.categoryCode);
        if (!category) {
          throw new Error(
            `Row ${rowNumber}, category not found.\nData: ${JSON.stringify(
              data
            )}`
          );
        }
        rows.push({ ...data, categoryId: category.id });

        rowNumber++;
      })
      .on("end", async () => {
        // Remove the uploaded file after parsing
        await fs.promises.unlink(path);

        // Map the parsed data into the Product model
        const products = rows.map(
          ({ name, price, description, categoryId }) => ({
            name,
            price,
            description,
            categoryId,
            createdAt: new Date(),
            updatedAt: new Date(),
          })
        );

        // Import the products into the database
        await Product.bulkCreate(products);

        res.status(200).send({ message: "Products imported successfully" });
      });

    fs.createReadStream(path).pipe(parser);
  } catch (err) {
    console.error(err.message);
    res.status(500).send({ message: "Internal server error" });
  }
};
Bạn để ý dòng code await fs.promises.unlink(path); , dòng này có nhiệm vụ xóa đi file đã cache trước đó khi process xong hoặc process bị lỗi.
Đây là format của file CSV:
name,price,categoryCode,descriptionTrong phần trên, mình đã lấy tất cả category code và đưa vào 1 Map, sau đó với mỗi dòng trong CSV thì mình sẽ kiểm tra xem category có tồn tại hay không, nếu có thì gán categoryId cho nó, nếu không, thì trả về với 1 lỗi.
Hãy tránh việc gọi db nhiều lần để lấy dữ liệu, nó sẽ làm app bạn chậm đi đáng kể đấy.
Đây chỉ là cơ chế validation cơ bản, cân nhắc validation nhiều hơn nếu bạn dùng trong thực tế nha.
Export product
Handler này export product ra CSV với schema y chang lúc mình đã import. Mình cho tối đa export 1 triệu bản ghi, còn mặc định sẽ là 100k bản ghi. Chứ để export quá nhiều chắc chớt luôn hệ thống.
export const exportProducts = async (req, res) => {
  let limit = req.query.limit || 100000;
  if (!limit || limit > 1000000) {
    limit = 1000000;
  }
  const products = await Product.findAll({
    limit: limit,
    attributes: ["name", "price", "description"],
    include: [
      {
        model: Category,
        attributes: ["code"],
      },
    ],
    subQuery: false,
    raw: true,
  });
  const dir = appDir + "static/exports";

  if (!fs.existsSync(dir)) {
    fs.mkdirSync(dir, { recursive: true });
  }
  const fileName = `${dir}/${process.hrtime.bigint()}-products.csv`;
  const csvWriter = createObjectCsvWriter({
    path: fileName,
    header: [
      { id: "name", title: "name" },
      { id: "price", title: "price" },
      { id: "category.code", title: "categoryCode" },
      { id: "description", title: "description" },
    ],
  });
  await csvWriter
    .writeRecords(products)
    .then(async () => {
      console.log("CSV file exported successfully");
      await fs.readFile(fileName, "UTF-8", function (err, data) {
        if (err) {
          console.error(err);
          res.status(500).send(err);
        }
        res.setHeader("Content-Type", "text/csv");
        res.setHeader(
          "Content-Disposition",
          "attachment; filename=products.csv"
        );
        res.send(data);
      });
    })
    .catch(async (err) => {
      console.error(err);
      res.status(500).send(err);
    })
    .finally(async () => {
      await fs.unlink(fileName, () => {
        console.log("DELETED THE TEMP FILE");
      });
    });
};
Mình có tối ưu lại một chút query để hiệu năng tốt hơn:
const products = await Product.findAll({
  limit: limit,
  attributes: ["name", "price", "description"],
  include: [
    {
      model: Category,
      attributes: ["code"],
    },
  ],
  subQuery: false,
  raw: true,
});
Với query sequelize như trên, thì ta có kết quả là một array với những product như sau:
[
  {
    name: "Handcrafted Fresh Salad",
    price: "602.00",
    description: "Boston's most advanced compression wea....",
    "category.code": "BKS",
  },
];
Điểm đặc biệt là 'category.code' , mà trong Javascript thì key của 1 object có thể là string, do đó nó hợp lệ.
Có 2 option mình truyền vào là subQuery cũng như raw. Cái trước sẽ tắt chức năng subquery, cái sau sẽ không transform dữ liệu mà chỉ lấy những prop như mình select, 2 tùy chọn này đều góp phần tăng hiệu năng của API.
Raw query sequelize compile ra như sau:
[14 ms] Executed (default): SELECT "products"."name", "products"."price", "products"."description", "category"."code" AS "category.code"
	FROM "products" AS "products"
	LEFT OUTER JOIN "categories" AS "category"
		ON "products"."categoryId" = "category"."id"
	LIMIT '1000';
Middleware logger
Ở đây mình có dùng thêm 1 em logger middlewares/logger.js, mục đích để xem console có request nào với status code nào, lúc benchmark nhìn vào console sẽ trực quan hơn, fancy hơn:
import colors from "colors";

const logger = (req, res, next) => {
  res.on("finish", () => {
    let color;
    if (res.statusCode >= 500) {
      color = colors.red.bold;
    } else if (res.statusCode >= 300) {
      color = colors.yellow.bold;
    } else {
      color = colors.green.bold;
    }
    console.log(
      color(`${req.method} ${req.originalUrl}: ${res.statusCode}`),
      new Date().toISOString()
    );
  });
  next();
};
export default logger;
Trong dự án thực tế bạn có thể stream log ra các nền tảng log khác nhau bằng cách sử dụng thư viện Winston
🥑 Vài kênh bạn có thể sử dụng để lưu log:
- Lưu vào database: https://www.npmjs.com/package/winston-mongodb
- Bắn notice sang telegram: https://www.npmjs.com/package/winston-telegram
- Prometheus: https://github.com/matsumana/winston-transport-prometheus
UI cho trang chủ
Để dễ test hơn thì mình có tạo 1 trang UI ở index để có form upload file cũng như show ra danh sách product (có phân trang), đây là handlers/index.js.
export const index = async (req, res) => {
  try {
    const perPage = 20;
    const page = parseInt(req.query.page) || 1;
    const offset = (page - 1) * perPage;

    const products = await Product.findAndCountAll({
      limit: perPage,
      offset: offset,
      order: [
        ["updatedAt", "DESC"],
        ["createdAt", "DESC"],
      ],
    });

    const pageCount = Math.ceil(products.count / perPage);
    const pages = [];
    for (let i = 1; i <= pageCount; i++) {
      pages.push(i);
    }

    res.render("index", {
      products: products.rows,
      pages: pages,
      totalPages: pages.length,
      currentPage: page,
    });
  } catch (e) {
    console.error(e);
    res.render("index");
  }
};
Mình cũng có thêm 1 view template của ejs, nhưng mà nó dài lắm, mình chỉ show cái form để upload, với cái table thôi nha:
<div class="form-group">
    <label for="file">Select CSV file to import</label>
    <input type="file" class="form-control-file" id="file" name="file">
</div>
<button type="button" class="btn btn-primary" id="import-btn">Import</button>
<div class="table-responsive">
    <table class="table table-striped table-hover">
        <thead>
        <tr>
            <th>Name</th>
            <th>Price</th>
            <th>Description</th>
            <th>Created At</th>
            <th>Updated At</th>
        </tr>
        </thead>
        <tbody>
        <% products.forEach((product) => { %>
            <tr>
                <td><%= product.name %></td>
                <td><%= product.price %></td>
                <td><%= product.description %></td>
                <td><%= product.createdAt.toDateString() %></td>
                <td><%= product.updatedAt.toDateString() %></td>
            </tr>
        <% }); %>
        </tbody>
    </table>
</div>
<script>
    const importBtn = document.getElementById('import-btn');
    importBtn.addEventListener('click', () => {
        const fileInput = document.getElementById('file');
        const file = fileInput.files[0];
        const formData = new FormData();
        formData.append('file', file);

        axios.post('/api/products/import', formData)
            .then(response => {
                console.log(response.data);
                alert("success")
            })
            .catch(error => {
                console.error(error);
                // handle error response here
            });
    });
</script>
Cài đặt express server
Ở file index.js, chúng ta cần khai báo và khởi chạy expressjs server:
import express from "express";
import {
  exportProducts,
  findManyProducts,
  findOneProduct,
  importProducts,
} from "./handlers/product.js";
import { index } from "./handlers/index.js";
import uploadMiddleware from "./middlewares/fileUpload.js";
import logger from "./middlewares/logger.js";
import appDir from "./utils/pathHelper.js";

const PORT = process.env.PORT || 8080;
const app = express();
app.set("view engine", "ejs");
app.set("views", appDir + "src/views");

// parse requests of content-type - application/json
app.use(express.json());

// parse requests of content-type - application/x-www-form-urlencoded
app.use(express.urlencoded({ extended: true }));

app.use(logger);

// routing
app.get("/", index);
app.get("/api/products", findManyProducts);
app.post(
  "/api/products/import",
  uploadMiddleware.single("file"),
  importProducts
);
app.get("/api/products/export", exportProducts);
app.get("/api/products/:id", findOneProduct);

app.listen(PORT, (error) => {
  if (!error) {
    console.log("App is listening on port " + PORT);
  } else {
    console.log("Error occurred, server can't start", error);
  }
});
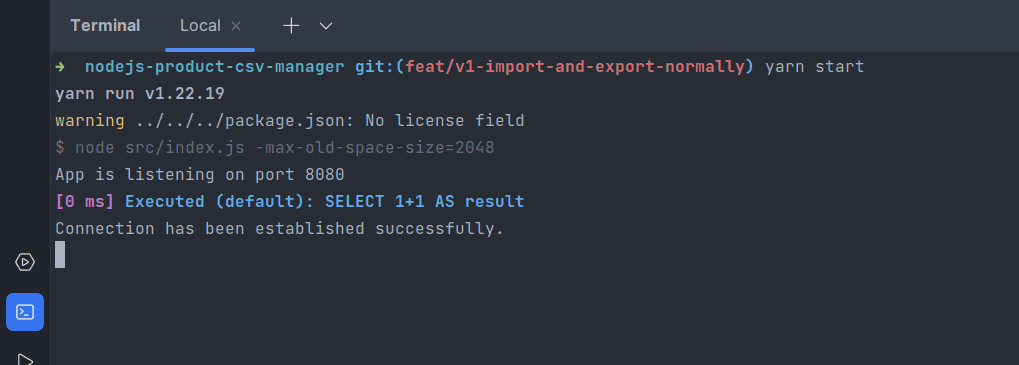
Chạy app lên
Để chạy được app ta có thể gõ node src/index.js, nhưng không, thường thì ta thêm sẵn script, rồi lúc cần chạy yarn dev hoặc npm run dev là được:
Ở đây mình dùng nodemon để có thể theo dõi được code change và reload app luôn.
"scripts": {
    "dev": "nodemon src/index.js --watch -max-old-space-size=2048",
    "start": "node src/index.js -max-old-space-size=2048"
  },
Lúc mình test benchmark thì app báo tràn memory, nên mình set lên 2GB ram, tình trạng đó không còn nữa. Phải thôi, những file mình import cả 100k - 1m rows, import hàng ngàn request thì RAM nào chịu nổi :D.
Với production thì nên set biến này tùy theo monitoring và yêu cầu nha.
Chạy app lên và see:
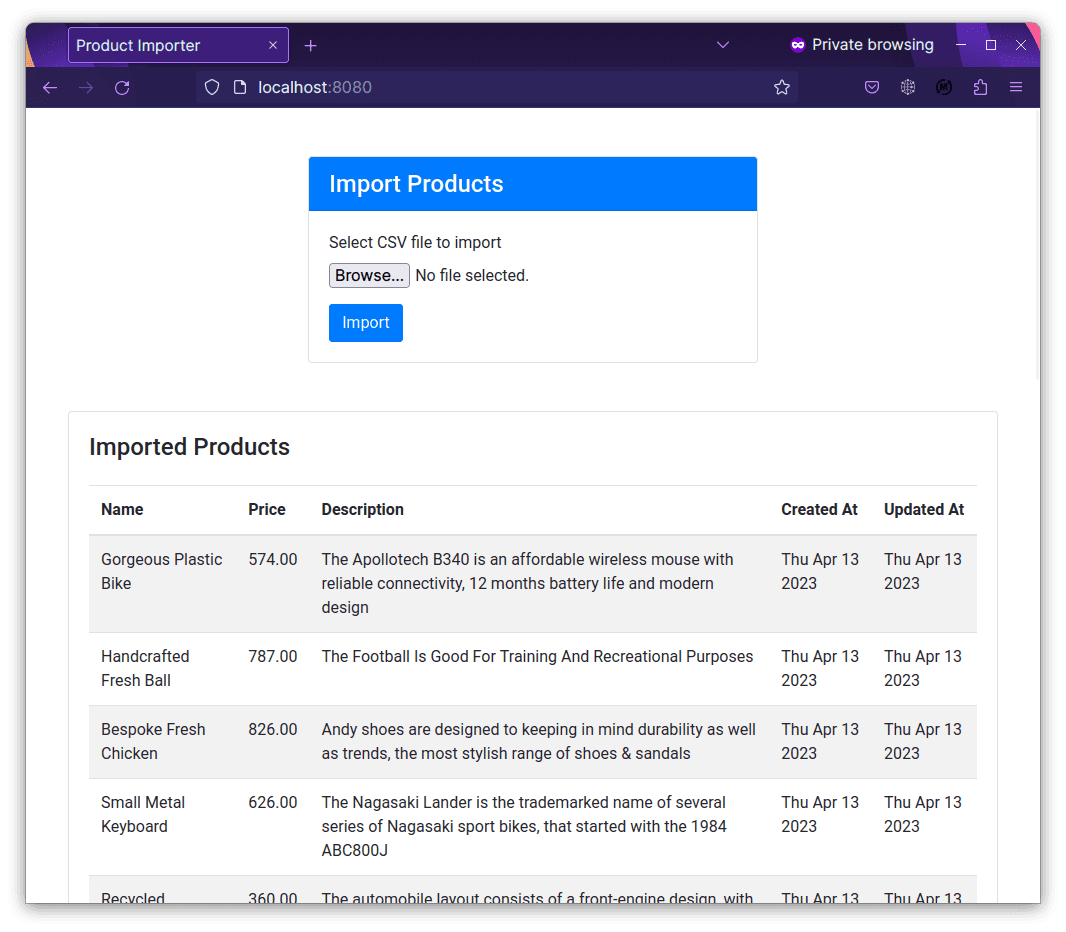
Còn đây là giao diện, mình code tạm bằng bootstrap:
Mình có thử import vài file trước đó rồi cho nên ở file này có show ra vài sản phẩm.
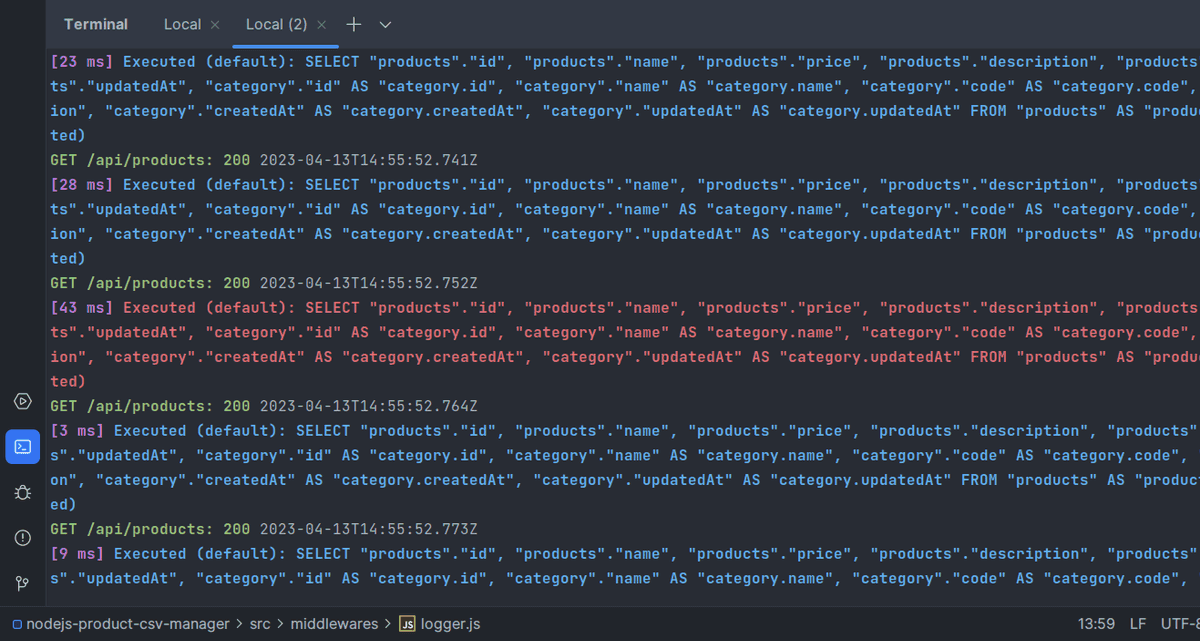
Lúc test nếu không in ra console thì chẳng biết nó process thế nào, endpoint nào, thành công hay thất b, do đó cái logger phía trên đã giúp chúng ta có 1 cái console fancy như sau:
Benchmark
Ở bước trên chúng ta đã cài thư viện autocannon, sau khi thử qua nhiều thư viện thì mình dừng lại với em này bởi vì nó hỗ trợ upload file. Còn artillery thì chỉ có bản pro mới support tính năng đó.
Tạo file CSV mẫu
Để việc tạo CSV dễ dàng hơn, mình sử dụng fakerjs mà mình đã cài đặt trước đó.
Tạo file csv-generator.js:
import { faker } from "@faker-js/faker";
import { createObjectCsvWriter } from "csv-writer";

const categories = [
  {
    id: "b2ff1377-c40c-4c10-b3a4-4d12c2f90bca",
    name: "Electronics",
    description: "Category for electronic devices",
    code: "ELC",
  },
  {
    id: "8c054e34-e65d-4b6e-b7f1-9d9b556e10d1",
    name: "Clothing",
    description: "Category for clothing items",
    code: "CLT",
  },
  {
    id: "a18b11cc-9a2e-4a04-b831-dde4667e8e0a",
    name: "Books",
    description: "Category for books and literature",
    code: "BKS",
  },
  {
    id: "773e7aa3-f06d-42af-a8c3-3cb50d966f26",
    name: "Home & Kitchen",
    description: "Category for home and kitchen products",
    code: "HKP",
  },
  {
    id: "b8f3c3eb-30f6-41dd-a7b8-518ff2db616f",
    name: "Health & Beauty",
    description: "Category for health and beauty products",
    code: "HBP",
  },
  {
    id: "5c6f5df6-5c5f-4a69-a38c-95d330c156e2",
    name: "Toys & Games",
    description: "Category for toys and games",
    code: "TNG",
  },
  {
    id: "54b31c80-38f6-4e6a-9f70-049a8e0905c9",
    name: "Sports & Outdoors",
    description: "Category for sports and outdoor products",
    code: "SPO",
  },
  {
    id: "66d74c4b-4b4d-4a54-935d-6b0b6faa07f4",
    name: "Automotive",
    description: "Category for automotive products",
    code: "AUT",
  },
  {
    id: "23212a97-74af-460e-bd3d-7b1320dd1c25",
    name: "Office Products",
    description: "Category for office supplies and stationery",
    code: "OFS",
  },
  {
    id: "141d2f17-91d8-4f9d-9143-3b8213c6f5a5",
    name: "Pet Supplies",
    description: "Category for pet supplies and accessories",
    code: "PET",
  },
];

const categoryCodes = categories.map((c) => c.code);

const generateProductsCsv = (rows) => {
  const csvWriter = createObjectCsvWriter({
    path: `./bench/sample-csv/products-${rows}-rows.csv`,
    header: [
      { id: "name", title: "name" },
      { id: "price", title: "price" },
      { id: "categoryCode", title: "categoryCode" },
      { id: "description", title: "description" },
    ],
  });

  const data = [];
  for (let i = 0; i < rows; i++) {
    data.push({
      name: faker.commerce.productName(),
      price: faker.commerce.price(),
      categoryCode: faker.helpers.arrayElement(categoryCodes),
      description: faker.commerce.productDescription(),
    });
  }

  csvWriter
    .writeRecords(data)
    .then(() =>
      console.log(`CSV file generated successfully with ${rows} rows`)
    )
    .catch((error) => console.error(error));
};
const rows = [10, 100, 1000, 10000, 100000, 1000000];
console.log("GENERATING CSV...");
rows.forEach((x) => generateProductsCsv(x));
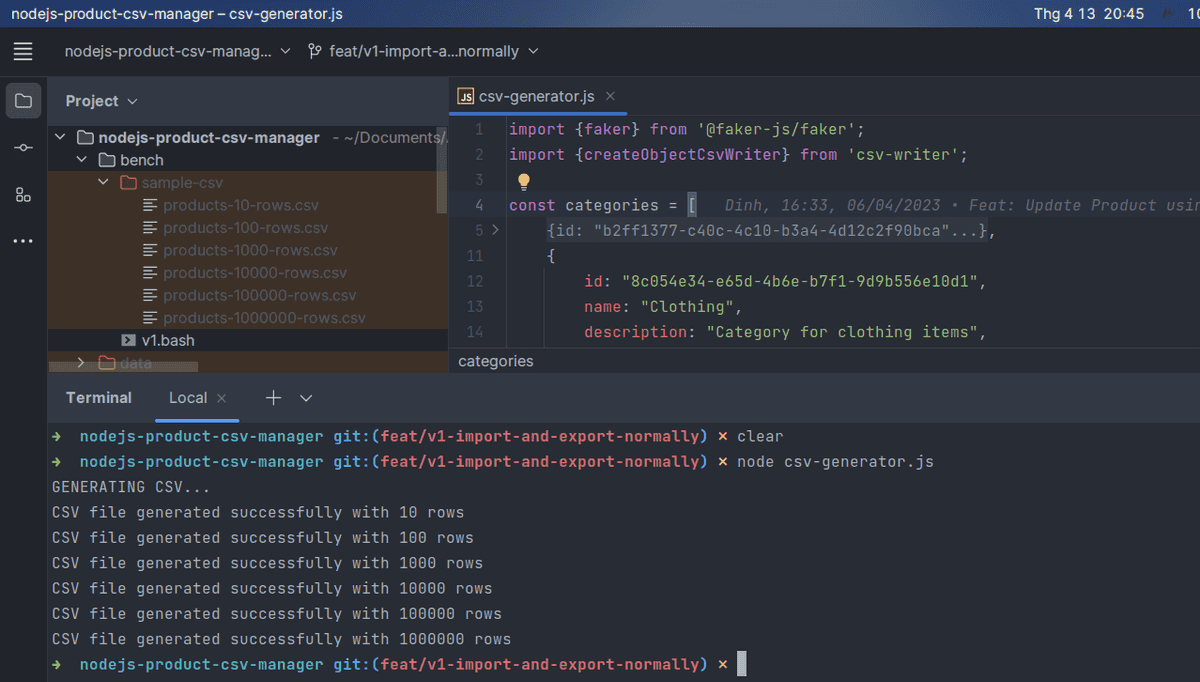
File trên lúc chạy node csv-generator.js thì sẽ có 6 file chứa từ 10, 100, 1000, 100k đến 1 triệu record nằm trong folder bench/sample-csv.
Tiến hành benchmark
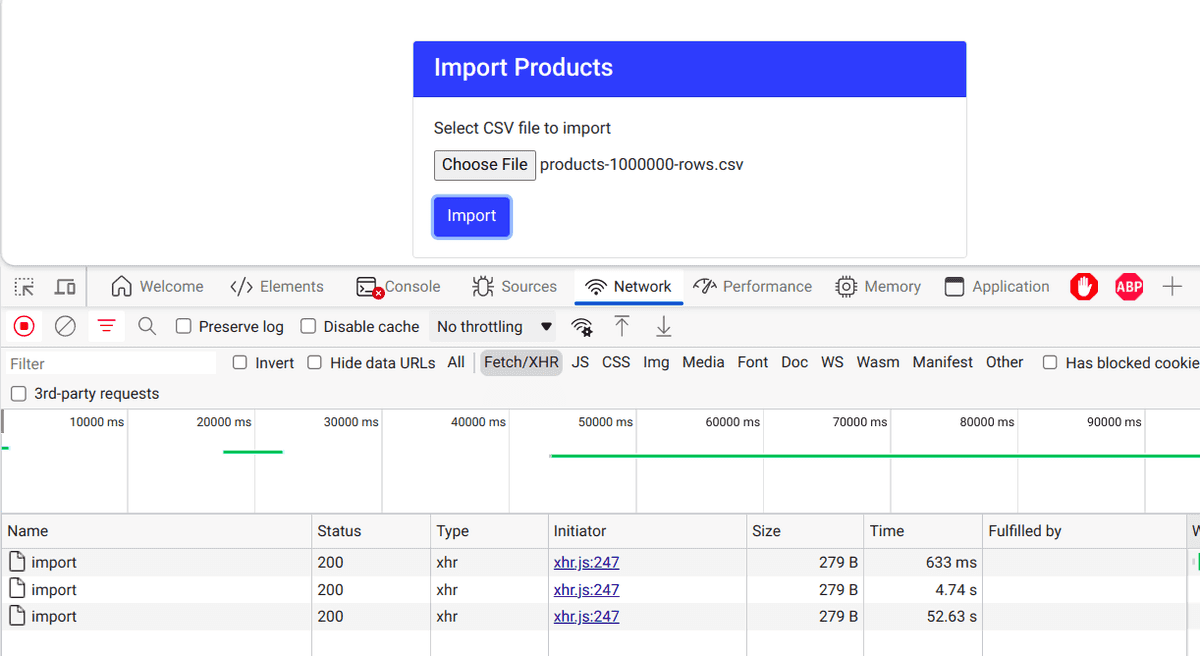
Test trên trình duyệt
Mình tiến hành delete hết bản ghi trong database và bắt đầu import lại, vì có hàng triệu dòng trong database làm ảnh hưởng hiệu năng lúc test.
Kết quả theo thứ tự cho import 10k dòng, 100k dòng và 1triệu dòng là: 633ms, 4.74s và 52.63s.
Con số khá tốt, không đến nỗi nào, vì node vốn dĩ không mạnh về các tác vụ non-blocking IO như việc transform những file lớn như vậy. Phần 2 của API này mình sẽ cố gắng cải thiện nó.
Stress test
Mỗi test vậy thôi thì hơi buồn, mình chạy stress test với số lượng file nhiều nhưng số dòng ít (1k-10k) xem thử nó đáp ứng ra sao.
Mình gom lại test case thành file benchmark v1.bash:
#!/bin/bash
set -eu

# Get the directory of the script file
SCRIPT_DIR=$(dirname "$(readlink -f "$0")")

echo -e "\e[34mTEST 10s with 5 connections and csv file of 1000 rows\e[0m"

autocannon http://localhost:8080/api/products/import -m POST \
  -F '{ "file": { "type": "file", "path": "'"$SCRIPT_DIR/sample-csv/products-1000-rows.csv"'" }}' \
  --duration 10 --connections 5 \
  --maxOverallRequests 10000

echo -e "\e[34mTEST 10s with 5 connections and csv file of 10000 rows\e[0m"

autocannon http://localhost:8080/api/products/import -m POST \
  -F '{ "file": { "type": "file", "path": "'"$SCRIPT_DIR/sample-csv/products-10000-rows.csv"'" }}' \
  --duration 10 --connections 5 \
  --maxOverallRequests 1000

echo -e "\e[34mTEST 10s with 5 connections get Products\e[0m"

autocannon http://localhost:8080/api/products -m GET \
  --duration 10 --connections 5 \
  --maxOverallRequests 100000
Bạn có thể thấy mình stress test 2 endpoint chính.
- Import product: Mình test 2 trường hợp chạy 10 giây, 5 kết nối đồng thời:
- Trường hợp đầu tiên tối đa 10k request với những file có 1000 records.
- Trường hợp thứ hai tối đa 1k request với những file có 10000 records.
- Get products: Endpoint này để stress test việc query liên tục vào database để lấy 200 product mới nhất.
Kết quả stress test chi tiết mình có để ở file readme, đây là tóm tắt kết quả sau 10 giây chạy cho mỗi test:
Test case thứ nhất import một tá file 1000 dòng: 262 request
Test case thứ 2, import nhiều file 10k dòng: 35 request
Test case số 3, GET 200 products liên tục: 1k request.
Kết luận
Dạo này mình viết bài nào cũng dài thật, hi vọng bài này có ích với các bạn trong khi tham khảo 1 API để import CSV đơn giản nhanh gọn.
Các con số kết quả stress test làm mình khá ngạc nhiên, vì khi code Go như bài viết connection pooling3, những con số benchmark ấn tượng hơn rất nhiều.
Nhưng cũng phải thôi, vì mình có dùng ORM, lại chưa kể Nodejs không mạnh về mấy cái blocking-IO, cho nên con số này chấp nhận được.
Thế mới có lý do mình viết tiếp phần 2 chứ, đón đọc hen!
Ở trên repo thì các bạn có thể kiểm tra code của bài này trong branch v1 nhé, lỡ đâu branch main mình update version 2 rồi.
Happy coding!
